Easy Way to Cinch Shirt in Back
Create an elastic casing to alter a dress in just a few easy steps
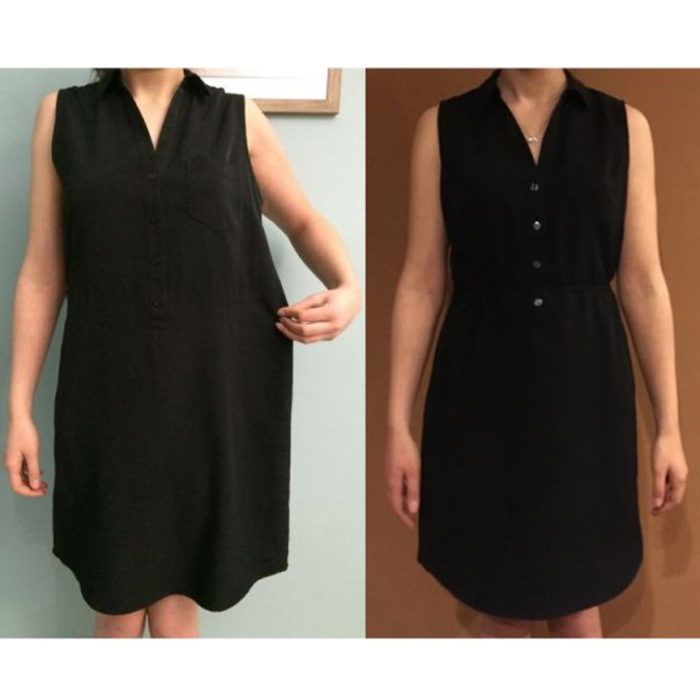
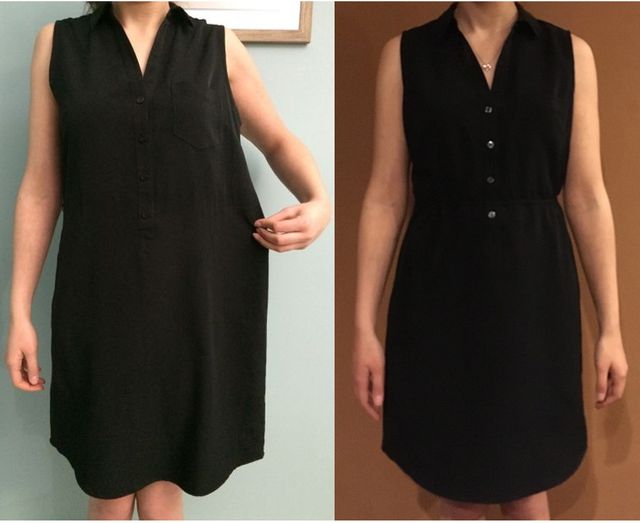
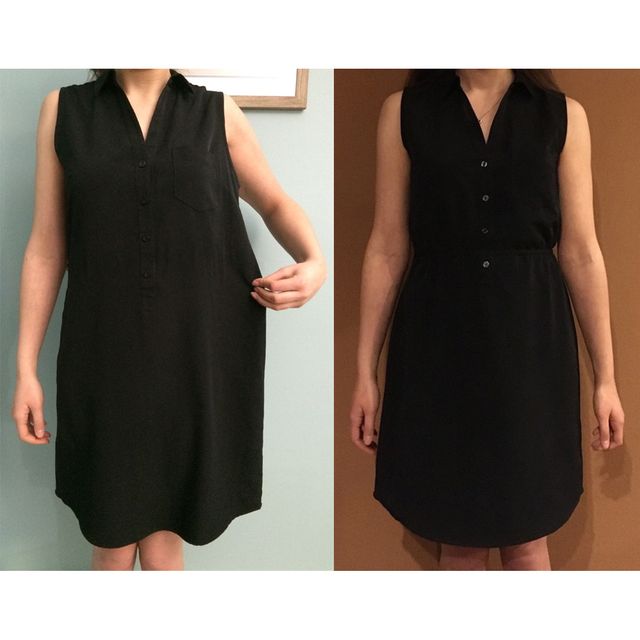
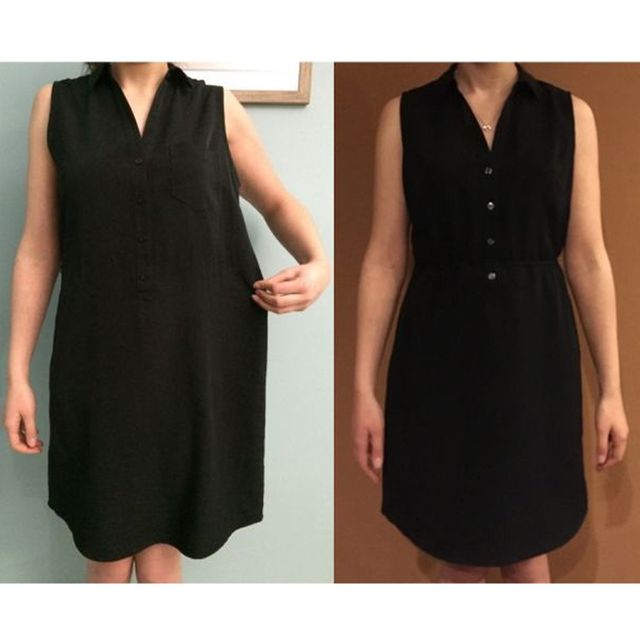
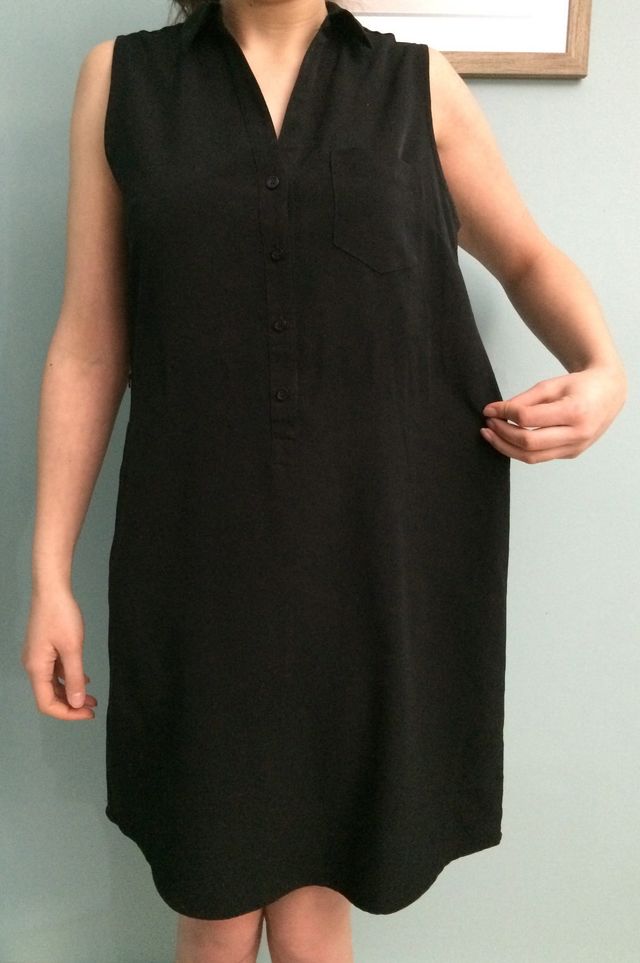
Altering garments to fit our bodies is a science. However, it doesn't always have to be so difficult. During a recent closet overhaul, I found a dress I hadn't worn in years simply because it was a few sizes too big. While I had spent months pushing it to the back of my closet, I just wasn't ready to part with it. Then I realized it could easily be altered to fit by adding an elastic casing that cinched the excess fabric at the waist. Lo and behold, after just a few hours, I had a beautiful upcycled garment that fit just right.
Below, I'll demonstrate how to alter an ill-fitting dress with minimal effort to produce flattering results. This works best with lightweight, drapey fabrics such as rayon, linen, and cotton.

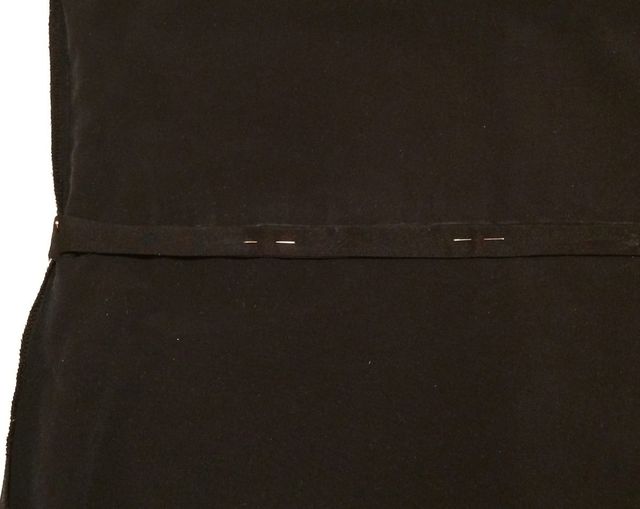
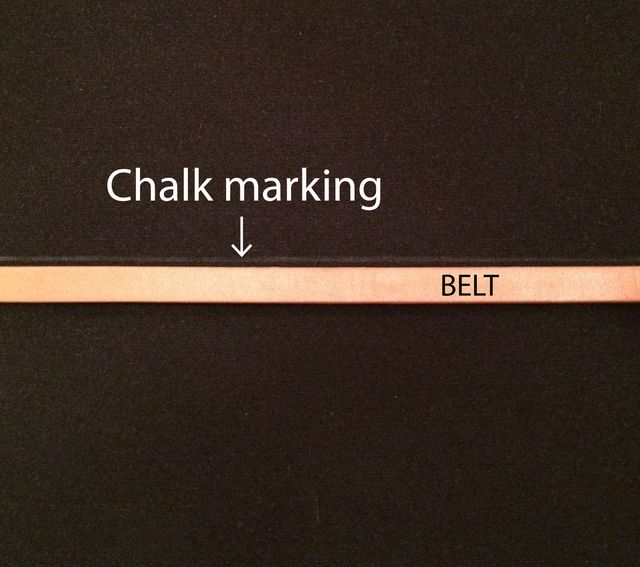
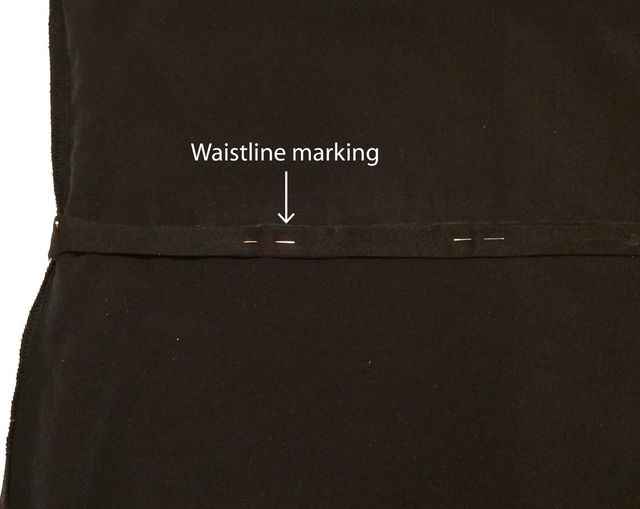
1. Mark the waistline. Try the ill-fitting dress on inside out and place a narrow belt around the desired waist location to determine where the elastic should sit. Mark this position with chalk or numerous pins along the belt's top edge. Take off the dress and use a ruler and chalk (or a water-soluble fabric marker) to draw in the full waistline.

Note that this line may not be straight all the way around. The bust, in particular, often causes the front to curve up and down.
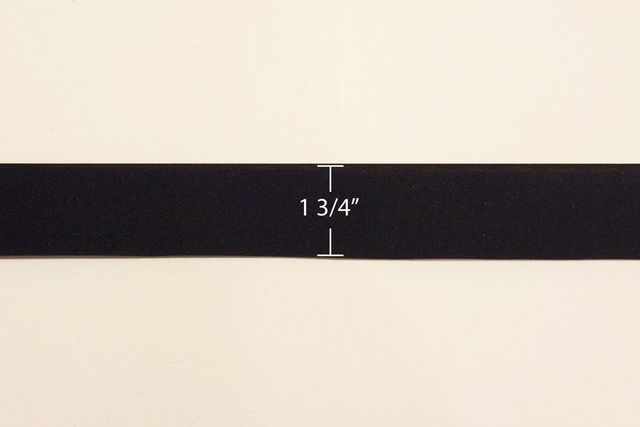
2. Measure the circumference. Place the dress on a flat surface and measure the dress's circumference along the chalk marking. Cut a 1 3/4-inch-wide strip of fabric the length of the dress's circumference plus 1 inch. This strip will be used for the casing. (Note: A 1/4-inch-wide piece of elastic was used in this example. If another size is preferred, adjust the strip's width accordingly.)

Tip: Be sure to choose a casing fabric that has a similar weight to the main dress fabric and doesn't show through when placed inside the garment.
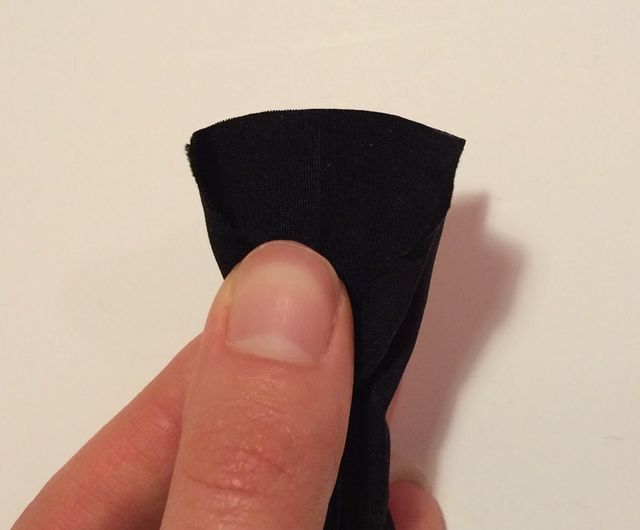
3. Form a tube. With right sides together, fold the casing in half lengthwise and press. Stitch 1/4 inch from the raw edges, leaving 1 inch to 2 inches of unsewn tube at each end. This will enable you to neatly secure the short ends together after the tube is turned right side out.

Fold the strip in half before sewing the raw edges together.
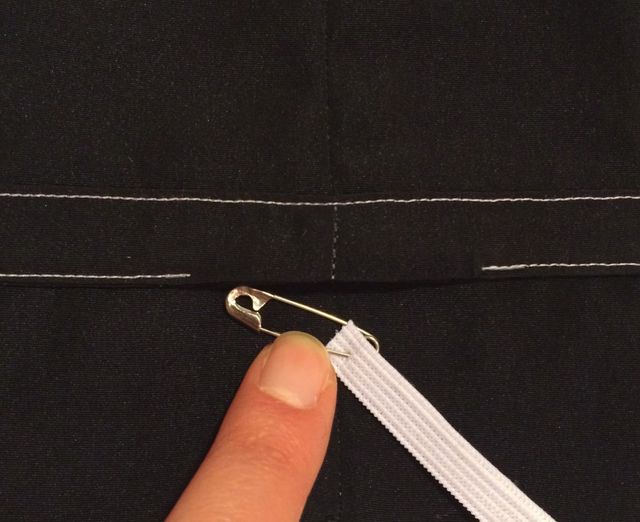
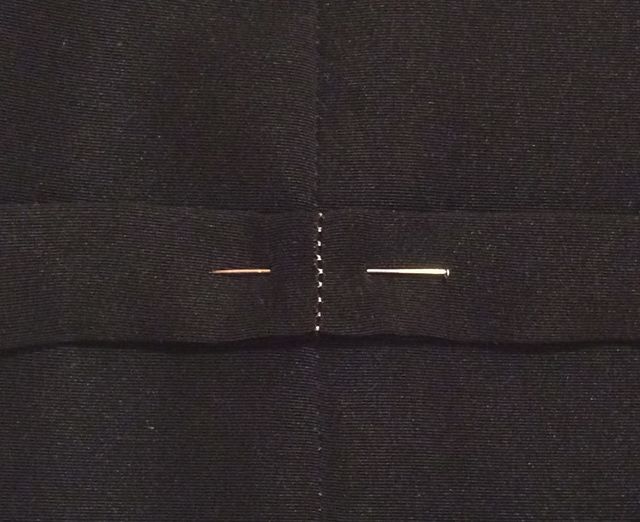
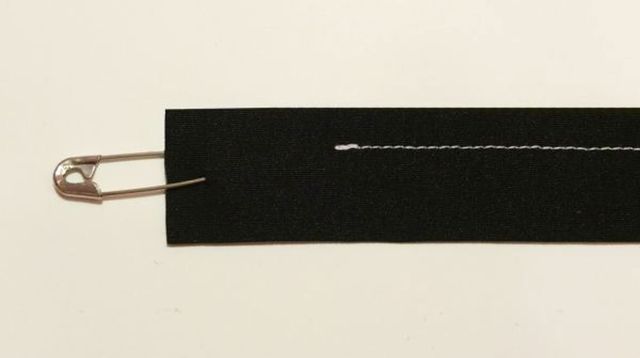
4. Turn the tube right side out. Secure a safety pin or bodkin to one tube end and push it through the tube and out the other end. Once the tube is right side out, press it flat with the seam along one edge.

Insert the safety pin through one layer of fabric to turn the tube right side out.
5. Connect the unsewn ends. Align the tube's short unsewn ends, making sure the tube isn't twisted. Sew the ends together with a 1/2-inch-wide seam allowance. Trim the seam allowances to 1/4 inch, and press open to reduce bulk. Finish this section by folding the tube in half and turning in the raw edges so they align with the rest of the tube. Press in place.

Sew the short ends together to create a clean finish.
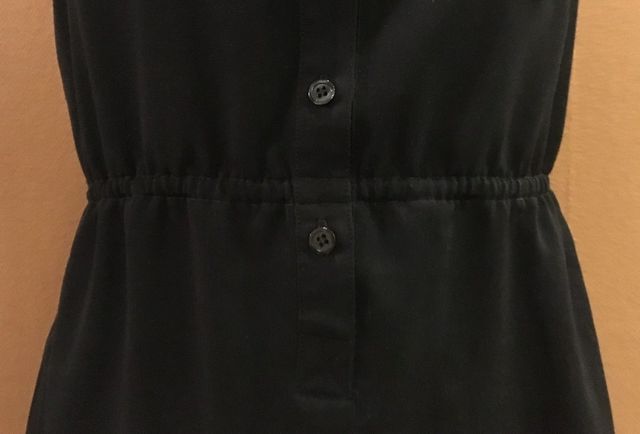
6. Pin the casing to the dress's wrong side. Align the casing seam sewn in step 5 with one of the dress's side seams. Pin the seam in place just below the waistline marking. Continue pinning the casing around the entire dress directly beneath the waistline marking.

With the dress inside out, pin the casing along the waistline marking.
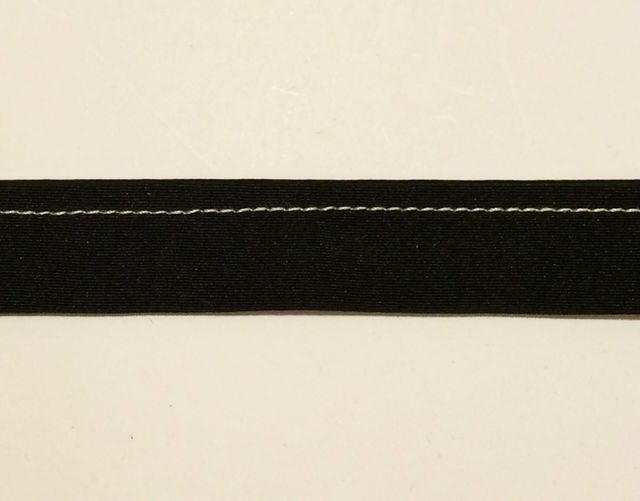
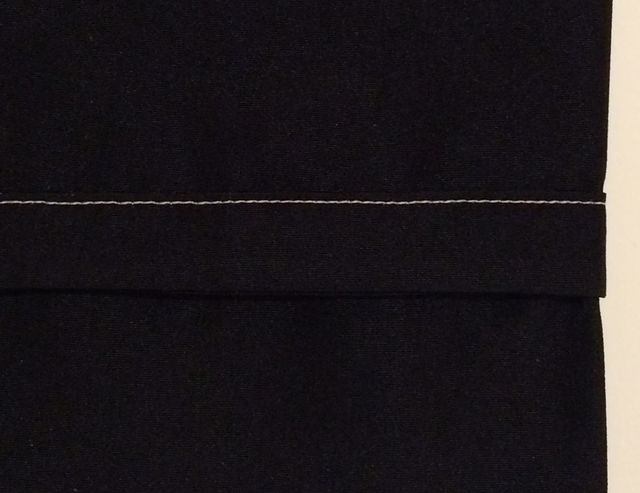
7. Secure the edges. Edgestitch along the casing's top and bottom edges to secure the casing to the dress. As pictured in step 8, be sure to leave a 1-inch to 2-inch opening at the side seam along the bottom edge to insert the elastic.

Edgestitch the casing with a thread color that matches the main dress fabric. I used a contrasting thread for clear visibility in the photographs.
8. Prepare the elastic.Wrap a piece of elastic around your body's preferred waistline. Add 2 inches to this measurement before cutting the elastic. Next, attach a safety pin to one elastic end and insert it through the casing's side seam opening. Feed the elastic through to the opposite side. Temporarily pin the elastic ends to a section of the casing so the ends remain outside the casing. Try the dress on right side out once more to check the fit and adjust the elastic as necessary.

Insert the elastic through the side seam opening.
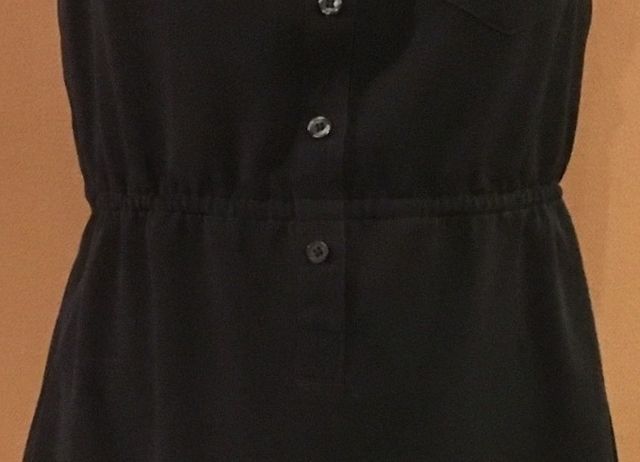
9. Finish the casing. Overlap the elastic ends by 1 inch and securely stitch them together with a zigzag stitch. Another option is to trim the elastic's seam allowance and use this no-bulk elastic join technique to secure the elastic ends. Next, stitch the casing's bottom open edge by hand or machine. Turn the dress right side out, evenly spread out the elastic gathers before wearing your new outfit.
 It really is that easy to transform an ill-fitting dress into a wardrobe essential.
Do you have any other favorite techniques for easily taking in garments? Have you tried this technique, or a similar one, before? Please share your comments below.


Get the latest including tips, techniques and special offers straight to your inbox.
hollowayenjor1958.blogspot.com
Source: https://www.threadsmagazine.com/2017/02/06/cinch-a-dress-with-an-elastic-waist
0 Response to "Easy Way to Cinch Shirt in Back"
Post a Comment